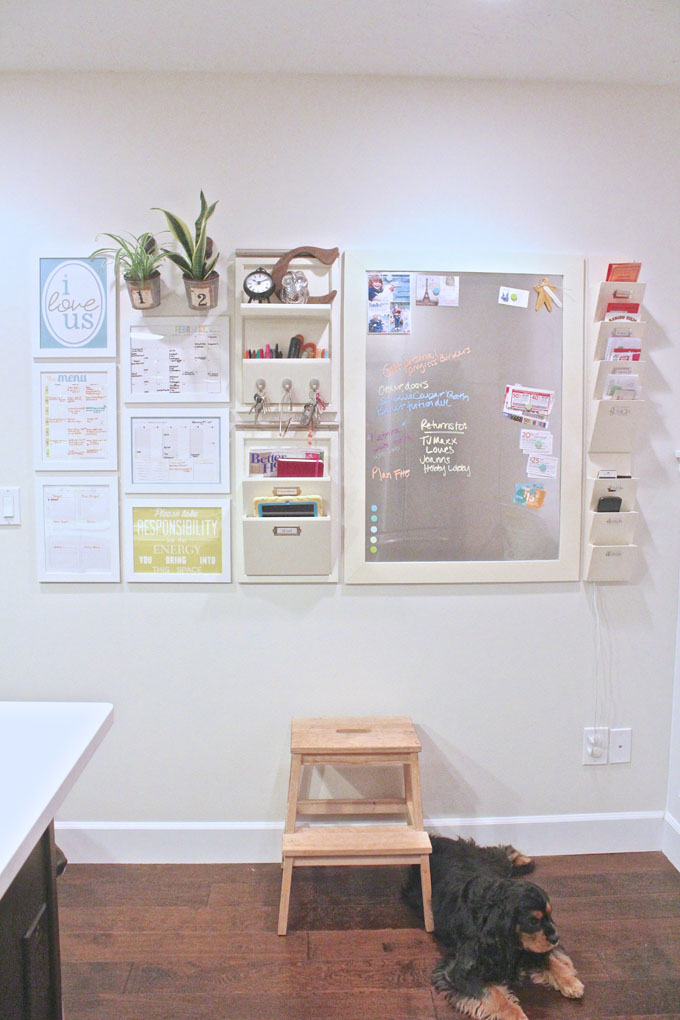
It's finally here. The reveal of my family kitchen command center. I bet you thought is was never going to come! Sometimes life likes to interject, doesn't it? #lifesfunnythatway
This command center was certainly a "labor" of love. We built the pockets from scratch and they kind of gave us a run for our money. Not to mention, I swear, I sabotaged myself several times by shooting nails out of the sides of them. Sometimes a half inch just isn't enough space ya know?
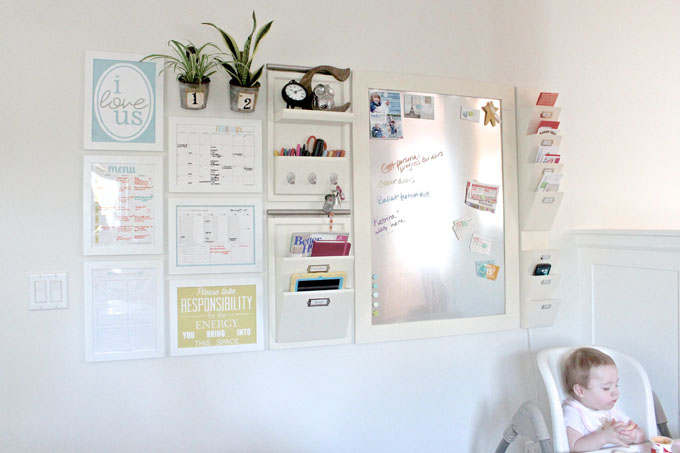
But after much toil and (as I mentioned on Twitter and FB) many almost swear words, I finally put the last touches on the command center. TA DA!! Or, as my 1 1/2 your old puts it, DA!! #seriouslythecutest
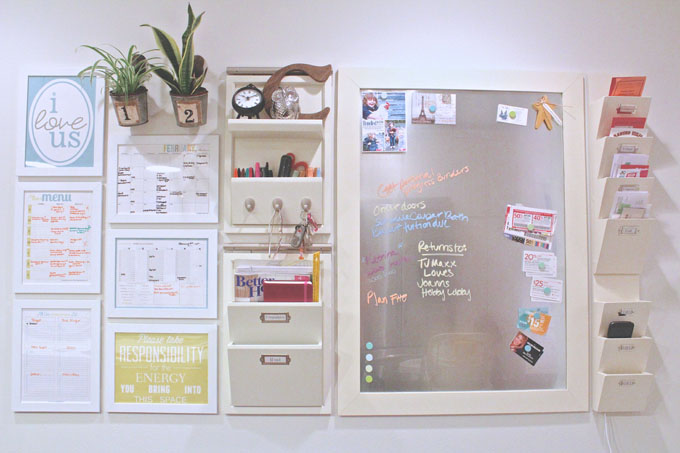
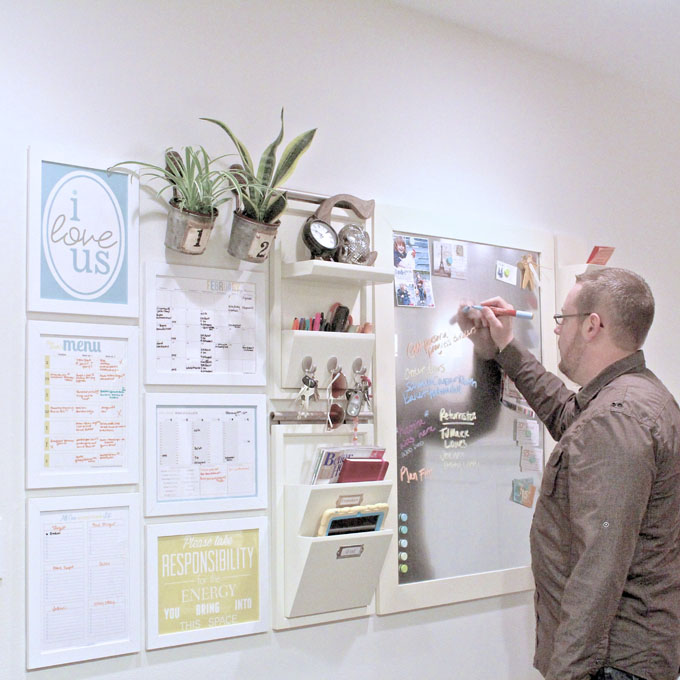
The magnetic board is one of my favorite features. It's a piece of sheet metal, with a piece of plexi-glass on top of it, all wrapped up in a custom frame. The sheet metal makes it so the board is magnetic and the plexi-glass makes it easy to write on. I found some nice earth tone wet chalk markers and they are the coolest things. They are a little pricey but I think they are worth it. Everything you write is bold, easy to see, and pretty. To hold through the plexi glass I bought some heavy duty magnets from my local hardware store and spruced them up with some Martha Stewart Craft Paint.
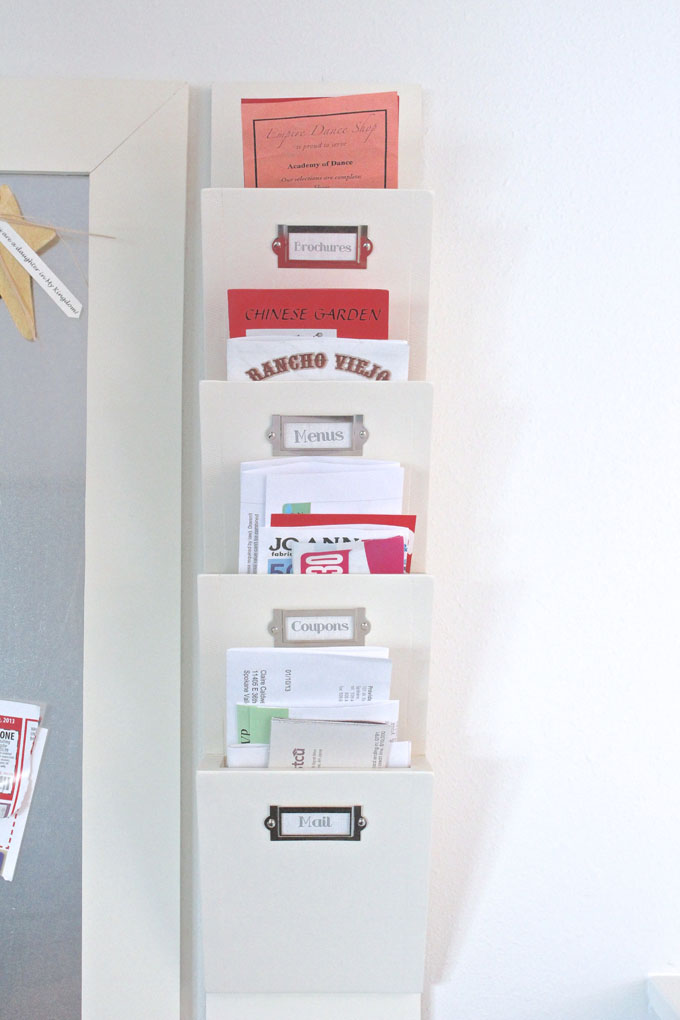
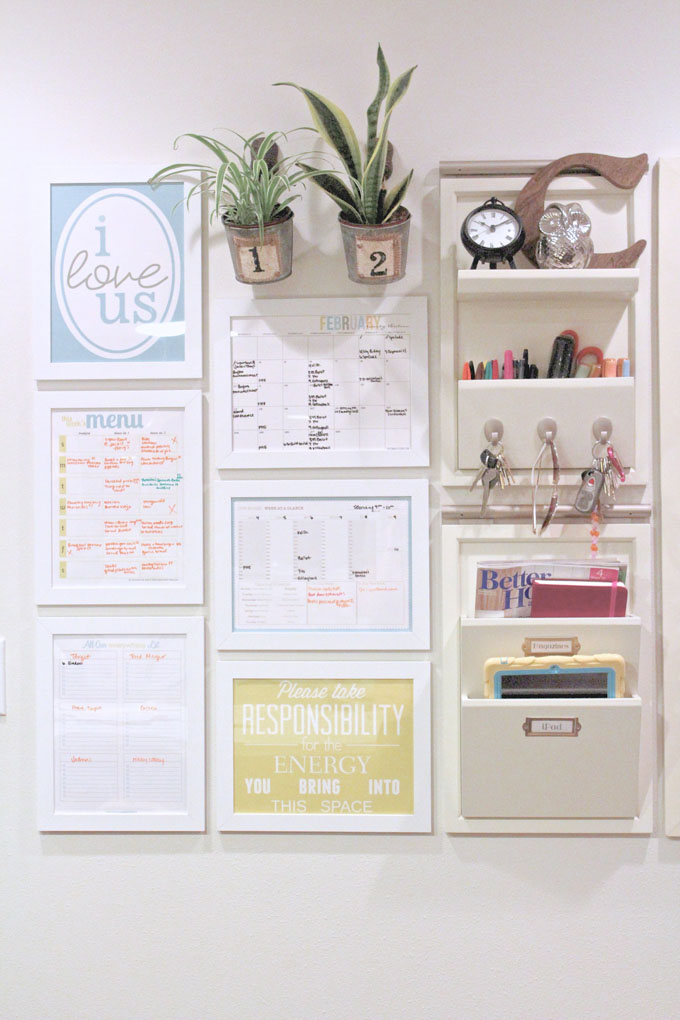
The side pockets were made just wide enough for to go menus, mail, coupons, etc.
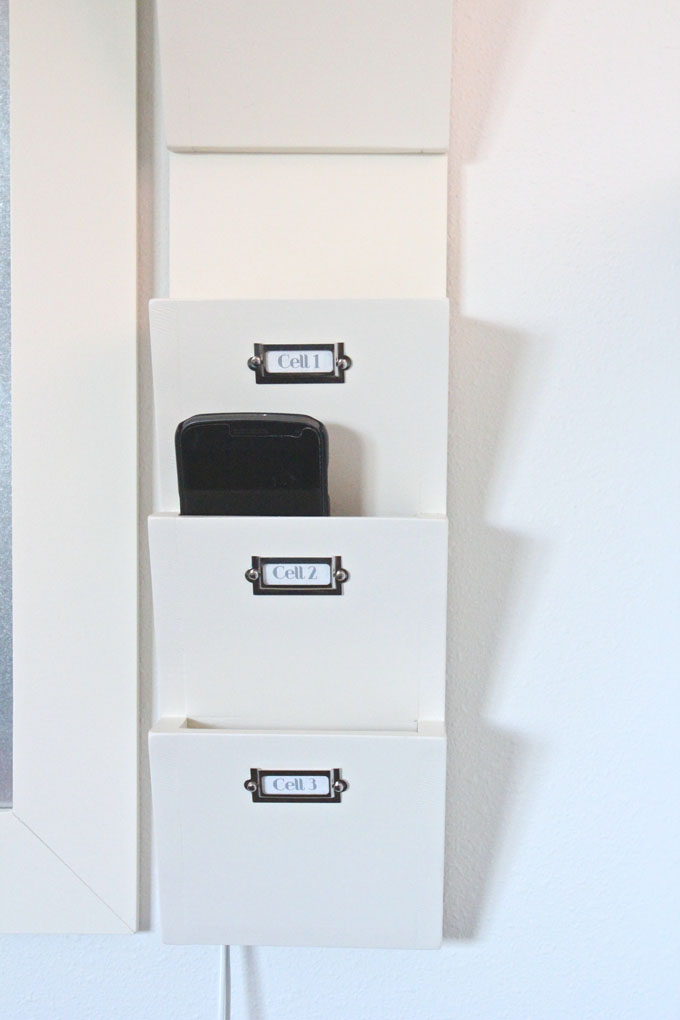
The lower pockets are for our cell phones. We notched out the bottom and ran the cords through. Just below the pockets we have this nifty plug that has two usb ports in it. This eliminates the need for our chargers and keeps the plugs open.
The middle letter bin and office organizer are part of the Daily System from Pottery Barn. The office organizer is very handy for holding our keys, markers, scissors, and general "stuff". The letter bin is where I keep all of my magazines and idea journal. This is also a perfect place for the family iPad.

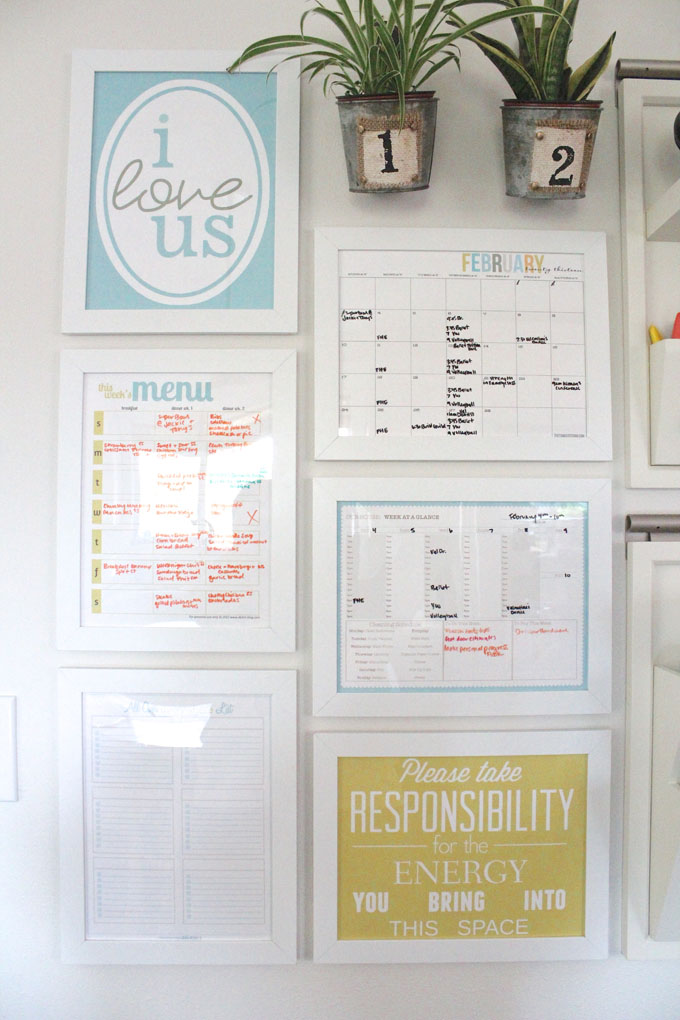
The left side of the command center is all about the printables. These keep my life from getting "ripped at the seams" (yeah baby, that's a Grease reference.) I keep a monthly calendar as well as a weekly calendar. The weekly calendar also has my cleaning schedule, weekly "to buy", and weekly "to do" list. I edited the Menu list to keep track of two weeks of dinners and eliminated lunch, which is usually just leftovers. The last sheet is an All Over Everywhere list to keep track of what I need at what store.. (Links to printables at the end.)
I tend to use C's in my decorating, so it's no surprise I put another one here. The little silver owl has been room hopping, since being on our Thanksgiving table, and I think he has finally found his home. The clock (and actually the "C" too) I bought in multiples so I could choose what combination went best on the little shelf. This little clock was the winner. It was a steal for only $12 (compared to some other similar, outrageously priced beyond my budget, clocks).
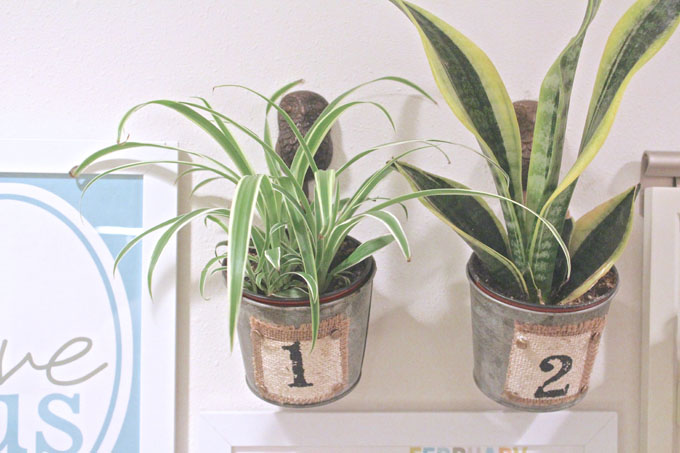
I had a small open area left that needed something. I originally was thinking about a plaque of some sort. I decided against it though and went with a little life instead. Greenery always makes a space more lively to me. I found the "cute as can be" little pots in the potting section of Joanns. It was a crazy lucky find. I really wanted numbers on my pots and these were ready to go. The owl hooks are from Hobby Lobby. They only had one of each color and I'm kinda glad. I really like the little difference in color, but probably wouldn't have done it if they would have had two of one color in stock.
So there you have it. It only took a year and a day to get this done, but I'm so glad it finally is. We have already got a ton of great use out of this wall of organization. And my kids make pretty good accessories to go with it too!

I Love Us Printable by Eighteen 25
All Over Everywhere List by Clean Mama Printables
Monthly Calendar by TomKat Studio
Week At A Glance by Mommy Tracked
Responsible For Energy Printable by Kind Over Matter
This project is entered in the Creating with the Stars Contest!

Also linked with:
Tags
- Facebook Like
- Google Plus One

- Log in to post comments


Comments
I love this! Well done! I've been searching pinterest for months looking for a 'command centre' that I can really work with and this is it! Great stuff.
Thanks! I'm so glad I could offer some help!
Love, Love, Love it!!! Where did you get the thinner side pockets! Neeeeed something like that!
Hi Loryn. Thanks for visiting! The side pockets were made by my husband and I. You can see how we did it in this tutorial.
I love it! It is so clean and pretty :)
Wow! You did a fantastic job! I love this. I'm a new follower ;)
Have a great week!
Jamie ~ Better With Age
Hi! I Love your command center! The charger station for the phones is great! All of it is wonderful! Pinned :)
Love the command center! I so need one of those :) Stopped by from Happy Hour Linky Party
I could never be this neat and this organized. I live in chaos. Even your dog is neatly tucked in at the bottom! This is spectacular - I can only dream.
Wow, I love everything about it! And if I had to hang something so neatly on the wall, I would be in more trouble than just shooting out a nail the wrong way! It must have taken a lot of patience =)
Just a quick question: How do you manage to plug in your phones? The plugs are hidden somewhere in the phone boxes, right?
Haha...it did take a little patience. The cords for the phones hang out of the bottom of the boxes and to a plug below. You can see it, a little, in the picture with our dog.
I love an organized space!! This is both functional and stylish! I love all the decorative accessories
WOW! This is the kind of organization I dream of! I absolutely LOVE the plexi-glass over the magnet board- so smart! Thanks so much for the great idea and inspiration! Have a wonderful weekend!
It is gorgeous! Love all the uses you fit into the space.
KC
So very cool...one of the nicest ones I have seen around...thanks for sharing...xo
looks fabulous. I love it all.
LOVE your command center - thank you for featuring my All Over Everywhere List - what a treat!
xo, Becky
My pleasure! I love your printables. I bought a bucket of 5 awhile back.
That is more than awesome! You must be so proud of yourselves!
Thanks Jen...yes, we love it so much. It is so wonderfully functional.
This is GREAT! Organized yet looks like art!
Where did you get the smaller pockets for the menus and cell phones? I didn't see those on the pottery barn website but they match perfectly! Thanks.
Thanks Mary! The magnet board frame and smaller pockets we made, from scratch, to match the Pottery Barn pockets.
I'm inspired!!
This is great! Is there any way to change the color on some of the print outs?
Thanks! Yes, actually all of the printables have been edited in some way (mostly just color). I open them in photoshop and play around with them until they are just right.
i LOVE it all! and i love your ipad case!! where did you score that? :)
Mel, thank you! The iPad case is a Gumdrop case from their Drop Tech Designer Series. They make them for iPad 2, 3, and now the mini too. You can find them here. We seriously love ours. My two kids beat that thing to heck and it's still in excellent condition.
I love how your command center turned out! It is beautiful! What size frames did you use for the printables? Were printables 8 1/2 x 11 paper?
Thanks! The frames are the Nyttja from Ikea and the printables are on 8 1/2 x 11 cardstock.
Oh my goodness, this is seriously the most organized droolworthy command center I've ever seen! Nice job!!!
This is absolutely beautiful! How are the printables hung so you can change out the months, etc. as necessary? Do the calendars and menu just stay in the frames and you write directly on the glass with dry erase or Vis a vis? Thanks for the info. :)
Thank you Kathleen! The printables are hung in Ikea Nyttja frames and are held with Command picture hanging strips. They easily come off of the wall so I can change my printables as needed. Yes, I write on the surface that came with the frame (in this case a plexi type surface) with Vis-A-Vis WET erase markers. I use the wet erase so my kids can't "accidentally" erase anything. Thanks for the interest, I hope that helps!
I am in love with this idea, but I have a question...is the calendar also 8 1/2 x 11 size? I would prefer it a little larger. I suppose you could print other sizes at a professional printing store, right?
Leanne, yes, the calendar is an 8 1/2 x 11. If you wanted to do the same layout, you could take the space above the calendar (where I have plants) and make a larger frame to fill up the space and have a bigger calendar, if that makes sense. I'm willing to bet a place like Kinkos or the UPS store could make a calendar in the size you want.
This is fabulous! I love it!
I just saw this...and OH MY! I love it! I want one now too! You're so creative!
Do you have dimensions and instructions for the small pockets? Also, what size is the magnet board?
The magnetic board (including the frame) is 39" x 28.5". You can find my tutorial for the pockets under my projects page. It's labeled DIY Letter Pocket Tutorial.
Can you estimate what this cost you to make all together? (minus labor! ha!)
You can now find the full cost breakdown here. I hope it helps!
What a fabulous organizational tool to have in your life! I found you linked thru Clean and Scentsible.... Love that you made this yourself. Fab job!! I need to get my life together like this!
Krista
Looks amazing! Do you have the plans for the pockets that you would be willing to share?
Hi Katie! You can find the tutorial for the pockets here.
I love your command center! How did you edit the printable version "I love us" to make "love" gray?
Thanks Dee! The printables were edited in Photoshop.
I love your command center! How did you edit the printable version "I love us" to make "love" gray?
My command center is very similar to yours - I love my pottery barn organizers! However, I kept feeling like something was missing. You inspired me to remove one of my "functional" frames and do a fun printable to give if more flare and decorated look. Love the blog I will be back for sure :-)
Hi Valerie
This is SO well done! Thank you for sharing.
Two questions: you mention using Chalk Ink for the magnetic board, but are using wet erase markers for the other lists/organizers -- do you find one is working better than the other on the plexi-glass (both for cleaning off (especially if you just have to take out one item or something, and need to do "detail erasing"), and staying on)? And, how is the plexi-glass holding up; is it getting scratched up at all?
Thanks for your time, and for all the great tips!
Hi Summer,
Both markers work great on the plexiglass. The wet erase markers are fine tip and so are a little harder to see on the board (I mainly use them for writing on the frames to the left of the magnetic board). The chalk ink is brighter and therefore easier to see and has a much larger tip so the writing is always a little more bold. They both stay on very well. The chalk ink can be dry erased but I never seem to have a problem with it coming off before I want it to. As far as "detail erasing" I just use a damp paper towel over my finger for both and it works fine. I suppose you could do it with a damp q-tip too. I haven't noticed any scratches at all on the plexiglass. I hope that helps!
That does help! I see that Chalk Ink makes a fine tip in white (it looks like the rest of the earthy colours (which are lovely!) don't come in thin tip, though). So, I think I will get that to try with my little framed-calendar project that your post has inspired (hopefully white will work if the calendar is dark).
Thank you for taking the time to respond to my question!
Pages